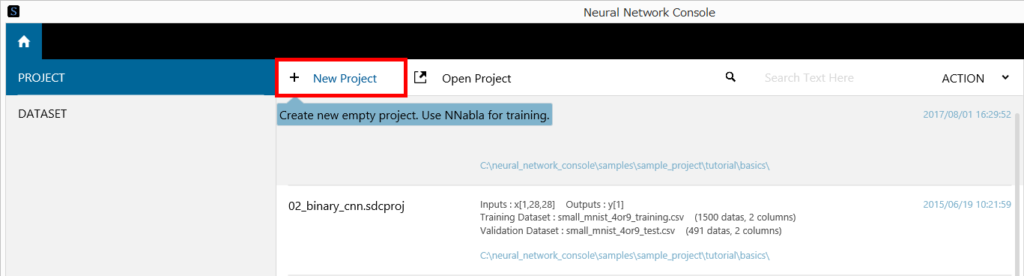
1 Creating a new project
Start Neural Network Console, and click + New Project to create a new project.
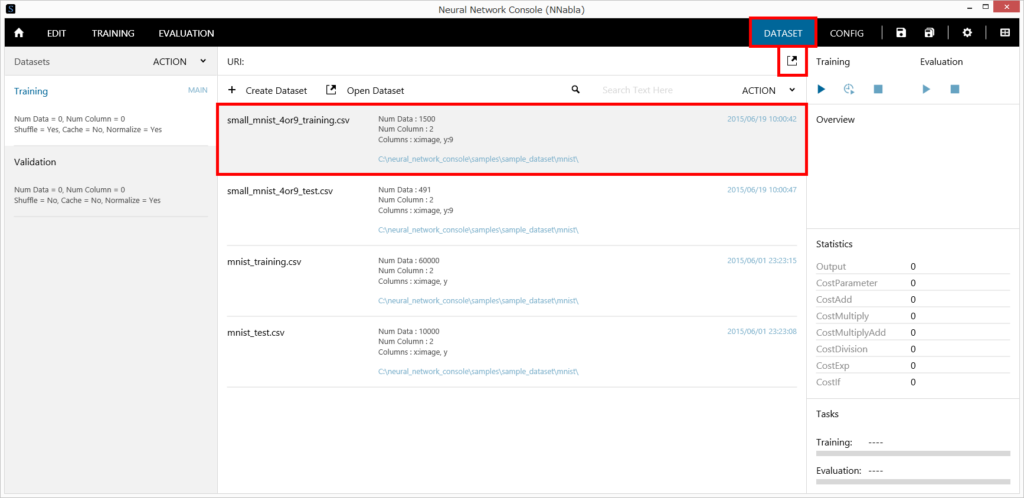
2 Assigning the datasets
On the DATASET tab, click the dataset assignment buttons, and assign small_mnist_4or9_training.csv to Training
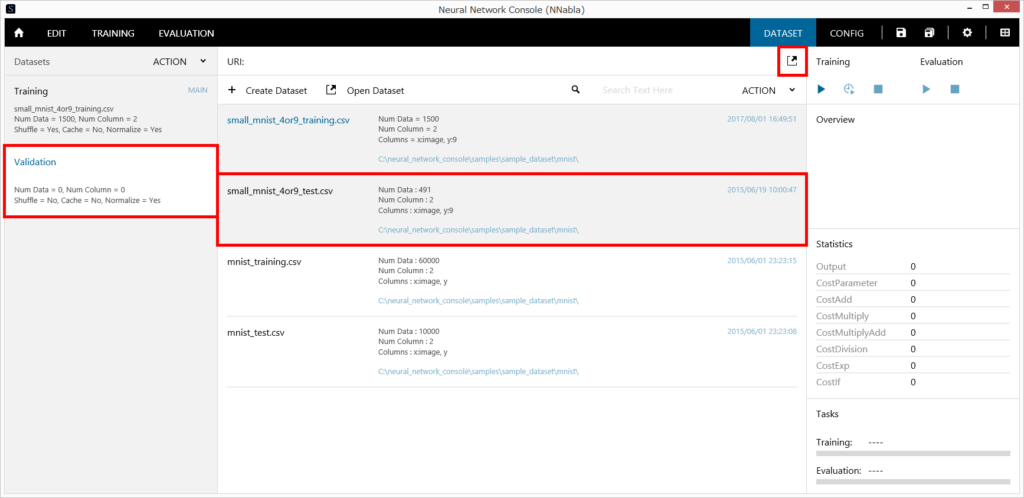
Click Validation and the dataset assignment buttons, and assign small_mnist_4or9_test.csv to Validation.
3 Designing the two-layer neural network
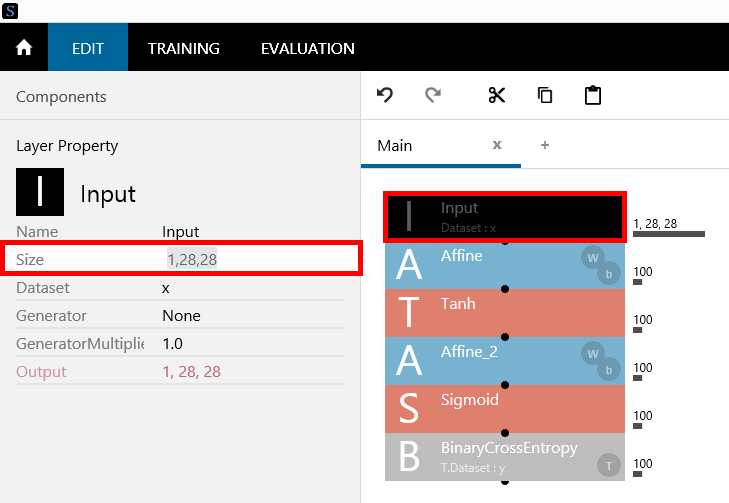
- Under “Component” on the left side of the EDIT tab, double-click on Input, Affine, Tanh, Affine, Sigmoid, and BinaryCrossEntropy, one by one, in order to add layers to the network graph.

Note
“Affine” is in the category Basic, “Tanh” and “Sigmoid” are in Activation, “BinaryCrossEntropy” can be found under Loss.
- Click Input layer to select it. Input “1,28,28” (the default value), which is the size of variable x (input data), in the Size box (click and input) under Layer Property.
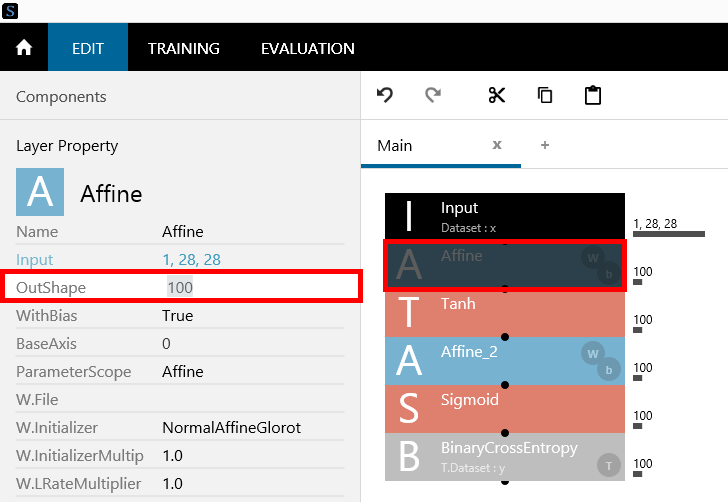
- Click the first Affine layer in order to select it. Set the number of intermediate layer nodes (e.g., 100, the default value) in the OutShape box under Layer Property.
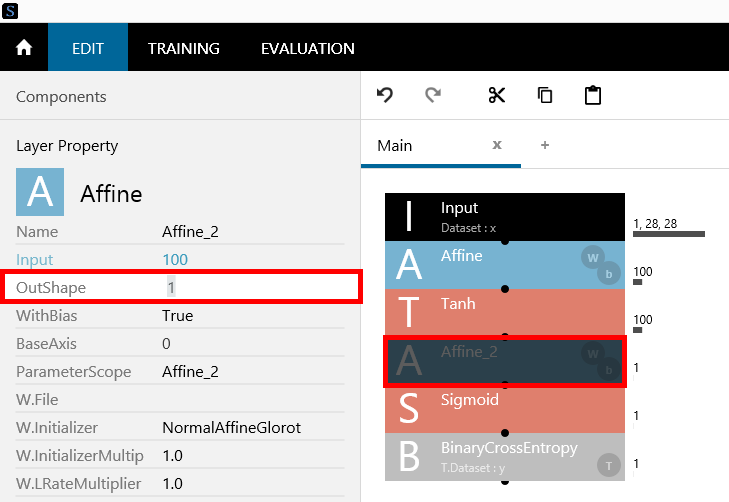
- Click the second Affine layer in order to select it. Set the number of output layer nodes (1, which is the size of variable y (output data) in this example) in the OutShape box under Layer Property.
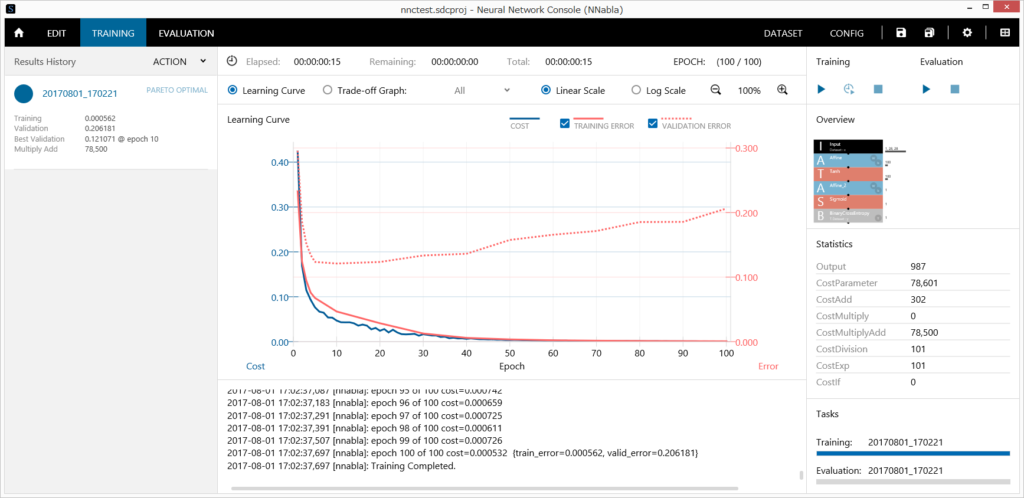
4 Executing training
Click the Run Training button (shortcut: F5). If the project is not saved, a message prompting you to save the project will appear. After you enter a file name and save the project, training will start.